

-

Sarasota Lawn Maintenance Services That Protect Value
A Sarasota lawn can look perfectly healthy on Friday and show stress by the following week. Summer rain can encourage rapid growth and fungal pressure, while salt air, sandy soil, irrigation gaps, and winter dry spells each create their own challenges. For homeowners who value a polished property, lawn care is not simply a matter of mowing on schedule. It is ongoing stewardship of one of the most visible parts of the home.
Sarasota lawn maintenance services should protect the appearance of your property while responding to the conditions that affect it throughout the year. The right approach keeps turf neat, supports plant health, and helps the landscape continue to complement the architecture, driveway, pool area, and outdoor living spaces around it.
What Professional Lawn Care Should Accomplish
A well-maintained lawn does more than create a pleasant view from the street. It frames the home, makes hardscape and planting beds feel intentional, and gives outdoor spaces the finished appearance they deserve. On a property with custom landscape features, inconsistent mowing lines, overgrown bed edges, or thinning turf can distract from otherwise thoughtful design.
Professional maintenance is most effective when it looks beyond the immediate task. Regular mowing, edging, trimming, and cleanup establish a crisp baseline, but they also provide opportunities to spot early changes in the landscape. A technician may notice a wet area near a sprinkler head, stressed turf along a driveway, a hedge beginning to crowd a walkway, or leaves collecting where drainage needs attention.
That observation matters. Addressing a small concern early is generally simpler and less disruptive than waiting for a lawn area to decline, a shrub to become overgrown, or an irrigation problem to affect a larger section of the property.
Turf care is seasonal, not one-size-fits-all
Florida lawns need different attention at different times of year. During the warm, wet growing season, turf may require more frequent cutting and closer monitoring for fungus, weeds, and insect activity. Mowing too low during periods of heat or heavy rain can weaken grass and leave it more vulnerable to stress. Allowing it to grow too long, however, can reduce its neat appearance and make each cut harder on the plant.
During drier stretches, irrigation performance becomes more visible. Grass near pavement, pool decking, or sunny western exposures may dry differently than shaded areas beneath mature trees. Winter brings slower growth, but it does not eliminate the need for a maintained appearance. Fallen leaves, uneven edges, and neglected beds can make an otherwise beautiful home feel unattended.
A thoughtful service plan adjusts for those conditions rather than treating every visit as identical.
Sarasota Lawn Maintenance Services Begin With the Whole Property
The lawn is only one layer of the landscape. A maintenance plan should consider the relationship between turf, planting beds, palms and shade trees, irrigation, lighting, pavers, fencing, and outdoor amenities. That broader view is especially valuable on custom homes and renovated properties, where materials and plantings have been selected to work together.
For example, clippings left on a paver driveway or around a pool deck can quickly diminish the appearance of a space designed for entertaining. Overgrown shrubs can hide landscape lighting, interfere with views, or soften the clean lines of an entry courtyard. Inadequate edging can allow turf to creep into shell paths, mulch beds, or hardscape joints.
The goal is not to make every landscape look overly formal. Sarasota properties vary widely, from tropical and layered gardens to restrained coastal designs with broad lawns and architectural planting. Good maintenance respects the intended character of the property while keeping it orderly and healthy.
Mowing and edging set the visual standard
Mowing is the service homeowners notice most quickly, yet quality is defined by more than grass height. Consistent mowing patterns, sharp edging, careful trimming around trees and structures, and complete cleanup create the finished look. Crews should also avoid practices that compromise the lawn for speed, such as scalping uneven turf or repeatedly cutting in the same direction.
Edges deserve equal attention. Along driveways, sidewalks, garden beds, and patios, a clean line clarifies the design of the landscape. It gives lawn areas proportion and prevents a gradual, unkempt transition between turf and more refined features.
Beds, hedges, and ornamental plants need measured care
Planting beds are often where a landscape gains color, texture, and privacy. They are also where a maintenance plan can either preserve the design or slowly erase it. Shrubs should be pruned with their natural growth habit in mind, not sheared into uniform shapes simply because that is faster. Palms and ornamental trees require appropriate attention, particularly where fronds or branches affect roofs, walkways, lighting, or sightlines.
Weed control, bed definition, mulch condition, and removal of spent material all influence the appearance of the property. Still, maintenance should be measured. Excessive pruning can reduce flowering, expose plants to heat, and leave a landscape looking sparse. The correct schedule depends on the species, sun exposure, age of the planting, and the homeowner’s desired level of formality.
Irrigation Awareness Protects the Landscape Investment
Many lawn problems begin as water problems. A brown patch is not always a lack-of-water issue, and a lush, fast-growing area is not always a sign that irrigation is working well. Broken heads, misdirected spray, clogged nozzles, rain-related scheduling issues, and uneven coverage can all affect turf and plant material.
Maintenance visits provide a practical opportunity to watch for signs of irrigation-related concerns. Water running onto pavement, unusually dry zones, oversaturated areas, or plants declining in a single section of the yard warrant attention. Early awareness can help prevent wasted water, stressed turf, and damage to surrounding landscape materials.
Homeowners should also remember that more water is not automatically better. Frequent shallow watering can encourage weak roots and create conditions favorable to disease. The appropriate approach depends on rainfall, soil conditions, turf variety, shade, and the needs of nearby plantings. A property with mature trees and a lawn around a pool will not necessarily need the same watering pattern as an open, newly landscaped yard.
Choosing a Maintenance Partner for a Sarasota Home
Price and visit frequency matter, but they should not be the only considerations. A low-cost service may handle basic mowing effectively yet offer little accountability when the property needs attention beyond the routine. For homes with significant landscape, hardscape, or construction investments, the value of maintenance lies in consistency, communication, and informed oversight.
Look for a provider that can explain what is included, how seasonal changes are handled, and who identifies concerns outside the standard scope. Clarify whether services include mowing, edging, trimming, cleanup, bed care, and basic irrigation observation. If you have landscape lighting, brick pavers, a fountain, retaining walls, or outdoor kitchen areas, ask how crews will work around those features.
It also helps to choose a team with the capability to address the next step when a routine visit reveals a larger opportunity. A declining planting bed may need a refreshed design rather than another round of trimming. A worn lawn may point to drainage, irrigation, shade, or soil issues. A property preparing for sale may benefit from targeted exterior improvements that strengthen its first impression.
Berryman Design Group brings landscape architecture, construction, property maintenance, and real estate perspective together, allowing homeowners to maintain the property they enjoy today while making informed decisions about future improvements.
Maintenance and Property Value Work Together
A cared-for lawn supports more than curb appeal. It signals that a home has been attended to, which can influence how guests, neighbors, and prospective buyers perceive the entire property. When it is time to sell, exterior presentation starts before anyone reaches the front door. Clean edges, healthy turf, defined beds, and tidy outdoor areas help a buyer see the home as move-in ready.
That does not mean every property needs a major landscape renovation before listing. Sometimes consistent maintenance, selective pruning, mulch refreshment, and attention to visible problem areas make the appropriate difference. Other times, an aging landscape no longer reflects the quality of the home and deserves a more comprehensive plan. The best choice depends on the property, the neighborhood, the timeline, and the owner’s goals.
For homeowners staying in place, reliable maintenance protects the enjoyment of outdoor living. A lawn that is routinely cared for makes the patio, pool, walkways, and garden areas more inviting without requiring the owner to manage every detail.
A Sarasota property deserves care that recognizes changing weather, distinctive architecture, and the considerable investment represented by the landscape. With attentive maintenance and a team that sees the complete property, the lawn can remain a strong, welcoming foundation for everything built around it.
-
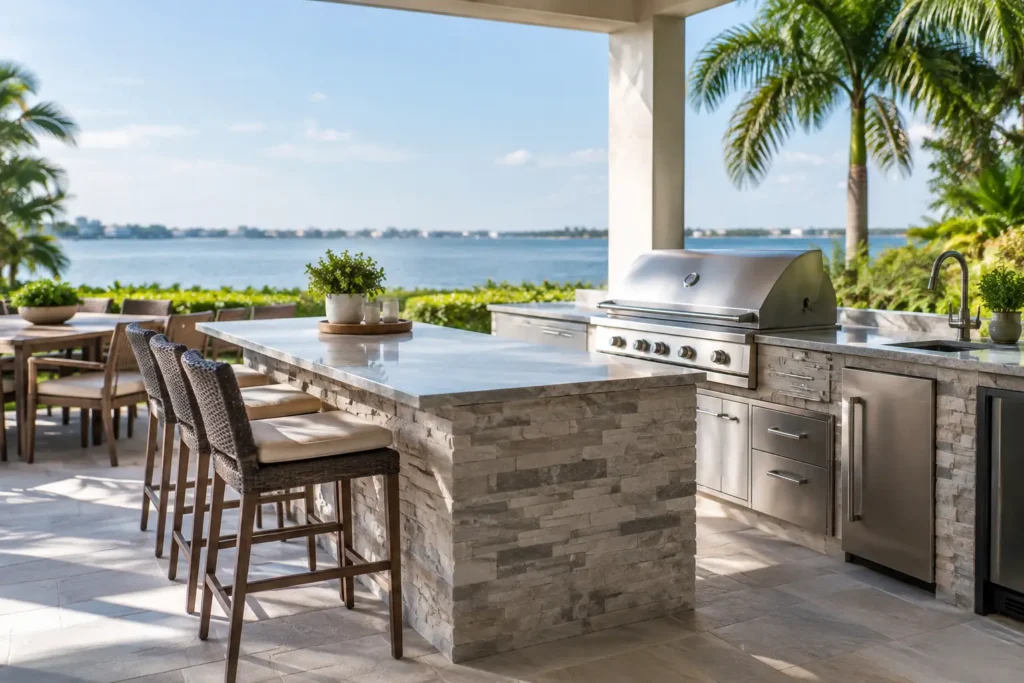
What Sarasota Outdoor Kitchen Builders Plan For
A Sarasota outdoor kitchen should do more than hold a grill. It should make a late-afternoon swim, a family dinner, or a full house of weekend guests feel easy. That requires more than selecting appliances and a countertop color. It requires thoughtful placement, durable materials, coordinated construction, and a clear understanding of how people will actually use the space.
For homeowners comparing Sarasota outdoor kitchen builders, the most valuable question is not simply, “What can you build?” It is, “How will this kitchen work with my home, pool, landscape, and long-term plans for the property?” The right answer brings those elements together from the beginning.
Start With the Way You Entertain
An outdoor kitchen can be compact and highly functional, or it can become the center of an entire outdoor living environment. The difference comes down to how the household lives.
A homeowner who enjoys quiet weeknight meals may need a quality grill, practical prep space, refrigeration, and lighting near the back door. Someone who hosts larger gatherings may need a broader cooking zone, a sink, ice storage, bar seating, multiple refrigeration drawers, and enough circulation space that guests are not standing in the cook’s path.
The location matters just as much as the appliance package. A kitchen beside the pool may support casual entertaining, while one positioned off a covered lanai may better serve everyday meals through much of the year. Views, prevailing sun, access to the indoor kitchen, privacy from neighboring properties, and proximity to utility connections all affect the plan.
A good design team will ask specific questions before proposing a layout: How many people do you host? Who does the cooking? Will the kitchen be used after dark? Do you want the grill visible from the living room, or tucked into a more private entertaining area? Those answers turn a collection of features into a space that feels natural to use.
Sarasota Outdoor Kitchen Builders Need a Coastal Mindset
Sarasota’s outdoor lifestyle is a major reason to invest in a kitchen, but the climate also raises the standard for design and construction. Heat, humidity, intense sun, wind-driven rain, salt air near the coast, and seasonal storms influence nearly every decision.
Marine-grade stainless steel appliances and hardware are often worth considering, particularly for properties close to the water. Standard stainless may look attractive at installation, but it can require more frequent cleaning and may show corrosion sooner in a salt-air environment. The best choice depends on the property’s location, exposure, and how much ongoing care the owner expects to provide.
Countertop selection also deserves careful attention. Natural stone can offer character, but some materials are more porous or maintenance-intensive than homeowners anticipate. Dense porcelain slabs, certain granites, and other outdoor-rated surfaces can be strong candidates when selected and installed correctly. The goal is not to choose the most expensive material. It is to choose one that can tolerate Florida conditions while complementing the home’s architecture.
Shade is another design decision with practical consequences. A covered structure can make an outdoor kitchen more comfortable during summer rain and high sun, but it must be designed with appropriate ventilation, clearances, drainage, and code requirements. A grill should never be treated like an indoor appliance placed outside. Heat, smoke, and air movement need to be planned for from the start.
Design the Kitchen as Part of the Property
An exceptional outdoor kitchen belongs to the home rather than appearing as an isolated addition. Its finishes, scale, hardscape, planting, lighting, and surrounding architecture should feel connected.
For a coastal contemporary home, that may mean clean-lined cabinetry, large-format pavers, restrained materials, and a palette that carries from the interior to the exterior. For a more traditional Sarasota residence, a kitchen might incorporate warmer stone, brick detailing, wood-look finishes, or a fireplace and seating area that extends the home’s existing character.
This is where an integrated design and construction approach provides a meaningful advantage. The kitchen affects more than its immediate footprint. It can change drainage patterns, require paver or concrete work, alter landscape beds, affect pool circulation, and create new lighting and irrigation considerations. If a future pool renovation, addition, or landscape transformation is likely, the kitchen should be planned so it supports that next phase instead of limiting it.
The Berryman Design Group approaches outdoor living as part of the complete property, coordinating landscape architecture, construction, hardscape, lighting, and ongoing maintenance needs around a unified vision. For homeowners, that can mean fewer gaps between the initial concept and the finished environment.
Build the Infrastructure Before the Finish Details
The features homeowners notice first are often the grill, stone facing, counter stools, and undercounter refrigerator. The details that determine whether the kitchen performs well are frequently behind the walls and beneath the surface.
Gas, electric, water, drainage, and ventilation must be evaluated early. A natural gas line may be preferred for frequent grilling, while propane can be practical where extending gas service is not feasible. Electrical requirements increase quickly when the plan includes refrigeration, ice makers, task lighting, outlets, fans, or specialty appliances. Outdoor-rated components and properly protected circuits are not optional details in Florida conditions.
Drainage deserves the same level of attention. Water should move away from the kitchen, adjacent structures, and the home itself. If the project includes pavers, a patio expansion, or a covered structure, grades and drainage paths may need to be adjusted. A beautiful kitchen can become a frustrating one if water pools around the seating area after a summer storm.
Permitting can also be part of the process, depending on the project scope and local requirements. Gas connections, electrical work, structures, plumbing, and major site improvements may require permits and inspections. Homeowners should expect their builder to explain what is included, what approvals may be needed, and how the construction sequence will be managed.
Know Where to Invest and Where to Be Flexible
Outdoor kitchens can vary widely in cost because the scope can vary widely. A straightforward grill island is not the same project as a fully equipped kitchen beneath a custom roof structure beside a renovated pool deck.
It usually makes sense to invest in the parts of the project that are difficult to change later: site preparation, utility lines, drainage, structural work, quality cabinetry, and the primary countertop. These are the components that protect performance and reduce the risk of expensive rework.
Appliance selection is more flexible. A homeowner may choose to begin with a grill, refrigerator, and storage, then add an ice maker or specialty cooking appliance later if the cabinetry and utility planning allow for it. This approach can be sensible when the overall outdoor environment is being completed in phases.
There are trade-offs with every choice. More bar seating creates a social atmosphere but can reduce prep area. A large hood can improve smoke control under a roof but becomes a prominent visual feature. Dark counters may look dramatic but can become hot in direct sun. A well-designed project acknowledges those realities instead of promising that every feature is right for every property.
What to Ask Before Choosing a Builder
The first meeting should leave you with more than a preliminary price range. It should give you confidence that the builder understands the property as a whole.
Ask how the kitchen will connect to existing utilities, how drainage and surface grades will be addressed, and who coordinates permits and inspections. Ask whether the proposed materials are suitable for your level of coastal exposure and what maintenance they will require. If the project touches the pool deck, landscape, lanai, or roofline, ask who is responsible for coordinating those adjacent elements.
It is also wise to discuss the construction experience from the homeowner’s perspective. Will you have one point of contact? How are changes handled? What needs to be selected before construction starts? Clear communication does not eliminate every decision, but it prevents small choices from becoming delays or surprises.
A builder should be able to explain the reasoning behind the plan in plain language. You do not need to become an expert in gas sizing, drainage slopes, or outdoor cabinetry. You should understand how the major decisions protect your investment and support the way you want to live.
The most successful outdoor kitchens are not designed around a single appliance or a trend photo. They are designed around the property, the climate, and the people who will gather there. Begin with that larger picture, and the finished space can feel like it was always meant to be part of your Sarasota home.
-
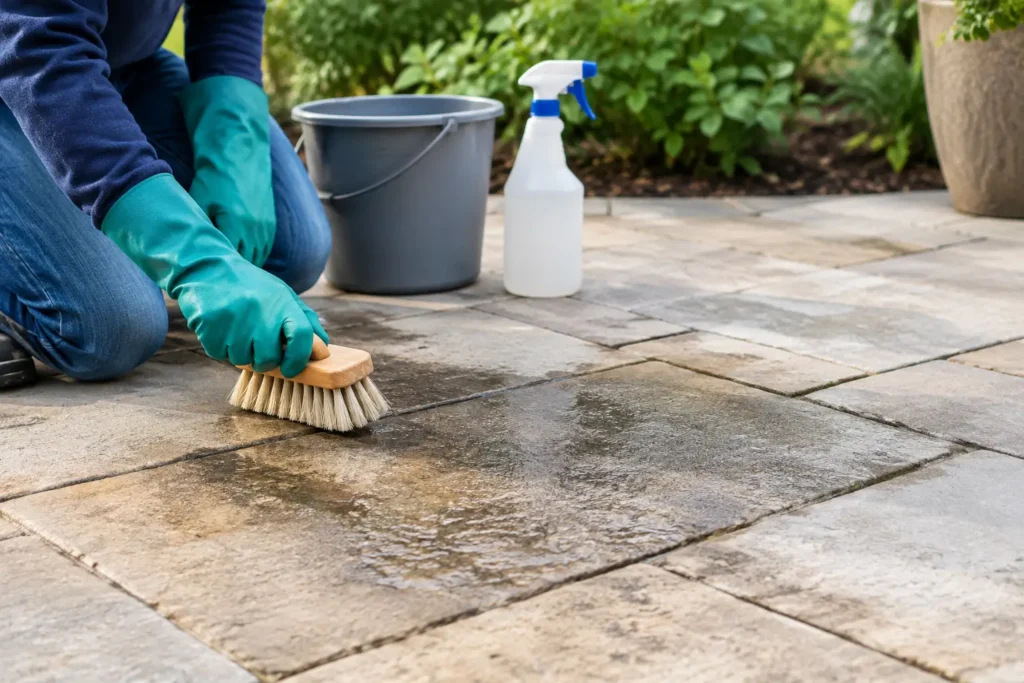
How to Remove Stains From Patio Pavers Safely
A beautiful paver terrace, pool deck, or driveway can make an entire Sarasota property feel more finished. But one rust ring beneath a planter, a dark spill from the grill, or blackened areas near a shaded wall can pull attention away from the design. Knowing how to remove stains from patio pavers without damaging the surface, joint sand, or surrounding landscape is what separates a quick cleanup from an expensive repair.
The right approach depends on two things: what caused the stain and what your pavers are made of. Brick, concrete, natural stone, and travertine do not respond the same way to water pressure or cleaning products. Start conservatively, test every cleaner in an inconspicuous location, and give the stain treatment time to work before reaching for stronger solutions.
Identify the Stain Before You Clean
Patio stains often look alike after a Florida summer, especially when rain, irrigation, humidity, and shade are involved. Yet treating a stain with the wrong product can set it deeper, bleach the paver, or leave an uneven patch that is more noticeable than the original mark.
Oil and grease are usually dark and may leave a slightly slick feel. They commonly appear beneath outdoor kitchens, grills, parked vehicles, and golf carts. Organic stains from leaves, berries, palm fruit, mulch, algae, mildew, or tannins are often brown, green, or black. Rust is typically orange or reddish brown and may come from metal furniture, fertilizer, irrigation water, or a forgotten tool.
Efflorescence is different. This chalky white film is caused by mineral salts moving through concrete or masonry as moisture evaporates. It is not dirt, and scrubbing with a general-purpose cleaner often does little. Paint, mortar, and tire marks also require their own methods. When a stain covers a large area, has returned several times, or appears connected to an irrigation issue, the source deserves attention as much as the paver surface.
How to Remove Stains From Patio Pavers Step by Step
Begin by clearing furniture, pots, and loose debris from the area. Sweep thoroughly so grit does not scratch the pavers during cleaning. Protect nearby plant material, and avoid allowing cleaning runoff to collect in planting beds, pools, fountains, or storm drains.
Wet the pavers with a garden hose before applying most cleaners. Pre-wetting helps prevent the product from soaking too quickly into porous material and makes the treatment more even. Use a stiff nylon-bristle brush rather than a wire brush, which can scar concrete and scratch certain stone surfaces.
Work in manageable sections, particularly on large pool decks and entertaining areas. Rinse thoroughly after treatment and let the pavers dry completely before deciding whether another application is necessary. Wet pavers can hide remaining discoloration or make a lightened area appear darker than it will once dry.
Oil and grease stains
For a fresh spill, absorb as much oil as possible immediately with an absorbent material made for oil cleanup. Do not rub the spill outward. Once the surface oil is lifted, apply a paver-safe degreaser according to its directions, allow the recommended dwell time, scrub gently with a nylon brush, and rinse.
Older oil stains may need repeated treatment because oils travel below the visible surface. A poultice-style product can be useful for deep stains on porous pavers, drawing the contaminant upward as it dries. Be patient with this process. Aggressive pressure washing may make the stain look better briefly while stripping joint sand or roughening the paver face.
Mildew, algae, and organic discoloration
Sarasota’s warmth and humidity make shaded patios, walkways, and pool enclosures especially prone to organic growth. A cleaner formulated for pavers and outdoor masonry can remove algae and mildew effectively when used carefully. Follow the product label, keep it off desirable plants, and rinse surrounding areas well.
If algae returns quickly, cleaning alone is not the complete answer. Trim back dense plantings that keep the patio damp, correct sprinkler overspray, clear blocked drainage paths, and consider whether a nearby downspout is concentrating water along the paver edge. Better air movement and drainage protect both the hardscape and the landscape around it.
Avoid relying on chlorine bleach as a routine paver cleaner. It can affect color, harm adjacent vegetation, and create runoff concerns. It may also leave the underlying moisture problem untouched.
Rust stains
Rust requires a dedicated rust remover that is labeled for the specific paver material. This is particularly important for natural stone and travertine, which can be damaged by acidic products. Apply only where needed, follow the stated dwell time, and rinse generously.
Do not use muriatic acid as a casual solution for rust, efflorescence, or general staining. While it can create a dramatic immediate change, it can also etch surfaces, alter color, weaken mortar, damage nearby finishes, and create significant safety risks. On a premium hardscape installation, the risk rarely justifies the shortcut.
Once the stain is gone, locate the cause. Metal furniture feet should have protective caps, planters should be raised slightly to allow drainage, and irrigation should be checked for iron-rich water or overspray. A stain that keeps returning is often a maintenance or site-condition issue rather than a cleaning failure.
White haze and efflorescence
Start with dry brushing and plain water for light efflorescence. For persistent deposits, use a cleaner specifically intended for masonry efflorescence and suitable for your paver type. Apply it sparingly and test first, because some products can change the appearance of colored concrete or textured surfaces.
Efflorescence can be temporary in newer installations as materials dry and salts migrate outward. Repeated heavy deposits, however, can point to persistent moisture below or behind the pavers. Drainage, base preparation, irrigation patterns, and edge conditions may need professional evaluation.
Use Pressure Washing With Restraint
Pressure washing can refresh a paver surface, but it is not automatically the safest or best treatment for every stain. Excessive pressure can erode the paver face, dislodge joint sand, expose the bedding layer, and create an uneven appearance. On older brick or softer natural stone, the damage can be permanent.
If pressure washing is appropriate, use a wide fan tip, keep the wand moving, and maintain a consistent distance from the surface. Never concentrate the stream in one spot or aim directly into joints. After a more thorough cleaning, joint sand may need to be replenished. If polymeric sand is used, it must be installed under the correct dry conditions and activated precisely as directed.
For large patios, driveways, or pool decks, professional cleaning is often the more controlled choice. An experienced team can match the method to the material, protect adjacent finishes and landscaping, restore joints where needed, and identify drainage or irrigation conditions that are contributing to the staining.
Prevent Future Paver Stains
A regular maintenance routine is easier on pavers than occasional aggressive cleaning. Sweep away leaves and landscape debris before they break down and leave tannin marks. Rinse food and drink spills promptly after gatherings. Move planters periodically, use saucers or risers that allow air beneath them, and avoid placing bare metal directly on the pavers.
Sealing can help reduce absorption and simplify cleanup, but it is not a cure-all. The right sealer depends on the paver material, finish, exposure, and desired appearance. Some sealers deepen color or add sheen, while others maintain a more natural look. Improper application can trap moisture, create blotchiness, or leave a slippery finish around pools, so product selection and preparation matter.
Irrigation deserves equal attention. Sprinklers should water planting beds and lawns, not patio surfaces, walls, furniture, or driveways. Fine-tuning spray patterns, repairing leaks, and keeping drainage routes clear will do more for long-term paver appearance than repeated cleaning treatments.
A well-maintained hardscape should support the way you use your home, not become another demanding project on the calendar. When stains persist or the pavers no longer look consistent with the rest of the property, a thoughtful assessment can restore the surface while protecting the landscape and outdoor living spaces built around it.
-
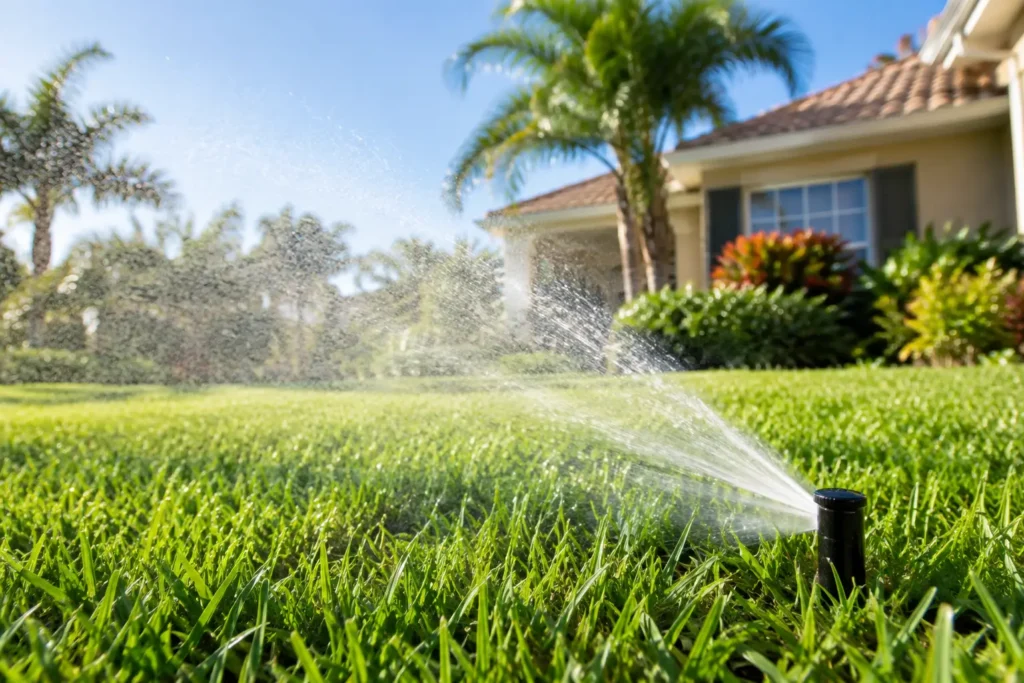
How Often to Water a Florida Lawn Properly
A Florida lawn can look lush one week and stressed the next, even when the irrigation system runs on schedule. Sarasota’s sandy soils, intense sun, summer rain, and changing seasonal temperatures make a fixed watering routine unreliable. Knowing how often to water a Florida lawn means responding to the grass, the weather, and the way water moves through your particular property.
For most established lawns, the goal is not daily watering. It is deep, purposeful watering that encourages roots to grow down into the soil, where they are better prepared for heat and short dry spells. A lawn that receives a little water every day may stay green temporarily, but it often develops shallow roots and becomes more dependent on the irrigation system.
How Often to Water a Florida Lawn in Sarasota
As a general rule, an established Florida lawn needs about three-quarters to one inch of water per week, including rainfall. During dry periods, that amount is usually best applied in one or two irrigation cycles rather than several light applications. In Sarasota, a twice-weekly schedule may be appropriate during a dry spring or fall period, while a single weekly watering may be enough when weather is mild and the lawn is holding moisture well.
Summer requires more restraint than many homeowners expect. Afternoon storms can deliver substantial water in a short time, and irrigation should be adjusted accordingly. Running sprinklers on top of frequent rainfall wastes water, can saturate the root zone, and may contribute to disease pressure in St. Augustinegrass and other warm-season turf varieties.
During the cooler, drier months, lawns generally grow more slowly and use less water. Many properties need irrigation only when the lawn shows signs of drought stress. The correct schedule is always subject to local watering restrictions, which can change by municipality, season, or drought conditions. Check the current requirements that apply to your address before setting or changing irrigation days.
New sod, fresh seed, and recently installed plantings follow a different schedule. They need more frequent, lighter watering at first because their root systems have not yet established themselves. That frequency should be reduced steadily as roots take hold. Keeping new sod constantly wet for too long can be as damaging as letting it dry out.
Water Deeply Instead of Watering Every Day
Florida’s sandy soil drains quickly. That is one reason a lawn can appear dry soon after a brief sprinkler cycle, even though the system has run every morning. The answer is usually not to add more days. It is to make sure each irrigation event delivers enough water to reach the active root zone.
For most turf, water should moisten the soil roughly 6 to 8 inches deep. Depending on sprinkler type, nozzle output, wind exposure, and soil conditions, that may take 30 to 60 minutes per zone. There is no universal runtime because irrigation systems vary widely from one property to another.
A simple catch-can test can reveal what your system is actually delivering. Place several straight-sided containers around a lawn zone, run the sprinklers, and measure the water collected. This shows whether coverage is even and how long it takes to apply the desired amount. It also exposes common problems such as clogged nozzles, tilted heads, overspray onto driveways, or one area receiving far more water than another.
If water begins to pool, run off toward the street, or collect along a paver edge, divide the runtime into shorter cycles with a break between them. This cycle-and-soak approach gives water time to enter the ground instead of leaving the property. It is especially useful on compacted areas, slopes, and lawns with mixed sun and shade.
Let Rainfall and Lawn Conditions Set the Schedule
An irrigation controller should support the lawn, not replace observation. Rain sensors and smart controllers can prevent watering during or immediately after rain, but they still need to be programmed correctly and checked periodically.
Watch for early drought signals between scheduled watering days. Grass blades may fold lengthwise, turn a dull blue-gray color, or fail to spring back after being walked on. These are better indicators than simply seeing a few brown tips, which may be caused by mowing stress, insect activity, disease, fertilizer burn, or uneven sprinkler coverage.
Too much water creates its own warning signs. A consistently soggy lawn, yellowing grass, mushrooms, increased weeds, and patchy decline can all point to excess moisture or poor drainage. In a shaded yard, watering needs may be dramatically lower than they are in an open, south-facing lawn. A mature oak canopy, a pool deck, a new addition, or a row of hedges can change how quickly different parts of the landscape dry out.
Best Time of Day to Water a Florida Lawn
Water in the early morning, ideally around sunrise through mid-morning. Temperatures are lower, winds are often calmer, and the lawn has time to dry after irrigation. This helps the water reach the soil instead of evaporating quickly in afternoon heat.
Avoid nighttime watering when possible. Moisture that remains on grass blades overnight can encourage fungal disease, particularly during humid summer weather. Watering in the late afternoon is also less effective because heat, wind, and rainstorms can make the application uneven.
A well-designed irrigation system should deliver water to the lawn and planting beds, not to the house, hardscape, or street. Besides wasting water, overspray can leave mineral deposits on pavers, create slippery surfaces, and contribute to unnecessary wear around foundations and outdoor living areas.
Grass Type Changes the Watering Conversation
St. Augustinegrass is common across Sarasota and performs beautifully in the right setting, but it needs attentive irrigation management. It generally benefits from deep watering when it shows drought stress, especially in full sun. Overwatering can make it more vulnerable to disease and root problems.
Zoysiagrass often has good drought tolerance once established, though its dense growth can require careful attention to coverage. Bahiagrass is typically more drought-tolerant and may not need the same level of supplemental irrigation as a highly manicured St. Augustine lawn. Bermudagrass performs well in sunny areas but can struggle where tree shade is significant.
Your lawn’s variety is only one part of the equation. Soil compaction, thatch buildup, shade, drainage, mowing height, and fertilizer practices all affect how much water it needs. A lawn that is mowed too short, for example, loses moisture faster and has fewer leaf blades to support healthy root growth.
Check the Irrigation System Before Adding More Water
When one section of lawn declines while another looks healthy, adding irrigation time across the entire property is rarely the right first move. The issue may be a broken rotor, blocked nozzle, damaged pipe, low pressure, poor zone design, or plant growth obstructing spray patterns.
Walk the property while each zone is running at least once or twice a year. Look for sprinkler heads that have settled below grade, nozzles spraying into shrubs, heads blocked by mulch, and dry pockets along driveways, walkways, or pool enclosures. These small corrections can make a substantial difference in lawn health and water use.
For larger properties, a professional irrigation review is often worthwhile when landscaping has matured or outdoor spaces have been renovated. New trees, expanded patios, retaining walls, and altered drainage can all affect an older system’s performance. The best irrigation plan is coordinated with the landscape design, hardscape, drainage, and maintenance needs of the entire property.
A Better Routine for a Better-Looking Property
A Florida lawn does not need constant watering to look refined. It needs the right amount of water, delivered evenly, at the right time, with adjustments for rain, season, and site conditions. That approach protects turf health while supporting the polished, well-maintained setting that makes outdoor spaces more enjoyable and helps preserve curb appeal.
If your lawn cycles between overly wet and chronically dry, the answer may be more than a controller adjustment. Berryman Design Group can help evaluate how irrigation, drainage, planting design, and ongoing landscape maintenance work together so your property performs as beautifully as it looks.
-
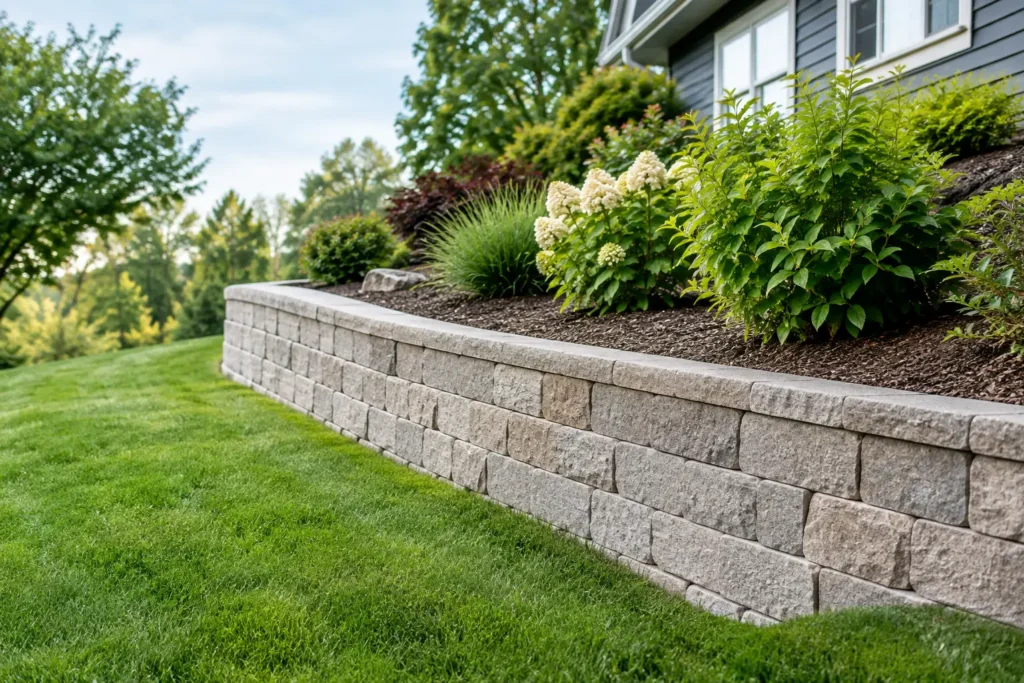
Retaining Wall Design for a Sloped Yard That Lasts
A sloped yard can be one of a property’s best visual assets – until runoff cuts channels through the landscape, a planting bed erodes, or the grade makes a patio feel disconnected from the home. Thoughtful retaining wall design for sloped yard conditions turns that challenge into a series of purposeful outdoor spaces. The result should do more than hold soil in place. It should manage water, improve access, support healthy plantings, and make the property feel intentionally designed from the house to the edge of the lot.
For Sarasota homeowners, the design process needs to account for intense seasonal rain, sandy soils, high groundwater in some areas, and the way outdoor living is used throughout much of the year. A wall that looks attractive on installation day but lacks a drainage plan can become a costly problem after a few storm seasons. Good design starts beneath the surface.
Start With the Grade, Water, and Wall Purpose
Every retaining wall begins with a clear question: what is the wall meant to accomplish? Sometimes the answer is simple – stabilize a slope near a driveway, pool deck, or property line. In other cases, the wall creates a level terrace for a lawn, garden, lounge area, or outdoor kitchen. The intended use determines the wall’s location, height, structure, and finish.
Before selecting materials, a professional should evaluate the existing grade, soil conditions, drainage paths, nearby structures, irrigation, mature trees, and utility locations. Water naturally follows the easiest route downhill. If that route is aimed at a foundation, patio, neighboring property, or the back of a retaining wall, the design must redirect it safely.
This is especially relevant in South Florida, where a brief afternoon storm can deliver significant water in a short period. Surface grading, collection points, drain lines, and properly placed outlets often matter as much as the visible face of the wall. A retaining wall is not a waterproof barrier. It is part of a larger site drainage system.
Retaining Wall Design for a Sloped Yard: One Wall or Terraces?
A single tall wall can create an immediate level area, but it is not always the best aesthetic or structural choice. Where the slope allows, a series of lower terraced walls often feels more natural and provides more opportunities for planting, lighting, and usable outdoor space.
Terracing can soften a substantial grade change by breaking it into manageable levels. One terrace may hold flowering shrubs or palms, another may create a lawn landing, and a lower level may connect to a pool or seating area. From the home, this approach can create depth and visual interest rather than the appearance of one abrupt drop.
There is a trade-off. Multiple walls require more site planning and can increase the overall footprint of the project. They also need enough space between levels so the upper wall does not place excess pressure on the lower one. On tighter properties, a single engineered wall may be the more practical solution. The right answer depends on slope, access, desired use, and the architecture of the home.
Choose Materials That Belong on the Property
The retaining wall should feel connected to the home and surrounding hardscape, not like a separate construction project placed at the edge of the yard. Material selection affects appearance, durability, maintenance, and budget.
Segmental concrete retaining wall blocks are a popular choice because they are available in a range of colors and textures, work well with curved layouts, and can be engineered for substantial grade changes. They can complement contemporary homes, Mediterranean-inspired architecture, and more traditional Sarasota properties when the color and cap are selected carefully.
Natural stone can deliver a more organic, established appearance and works beautifully in garden-focused settings. Its character comes with variation, which is often an advantage, but installation requires skilled craftsmanship to maintain stable courses and a clean finish. Stone veneer over a properly engineered structural wall may offer the visual effect of stone while giving the project more flexibility.
Poured concrete walls can be finished with stucco, stone, tile, or other cladding that ties into the residence. They are often appropriate when a wall needs to integrate with stairs, raised planters, seat walls, fountains, or built-in outdoor features. Brick and pavers can also be used as finish materials to relate the wall to a driveway, walkway, or patio.
The most attractive option is not automatically the right one. A wall near a salt-exposed coastal property, a heavily irrigated planting bed, or a pool environment may need materials and finishes selected for those specific conditions.
Drainage Is the Part You Should Never See
A finished retaining wall may look like a simple vertical surface, but the critical work happens behind it. Soil becomes heavy when saturated. Without a path for water to escape, pressure builds behind the wall and can lead to leaning, cracking, bulging, or failure.
A properly detailed system generally includes compacted base material, free-draining aggregate behind the wall, drainage pipe where required, fabric to separate soil from aggregate, and protected discharge points. The wall design must also consider where roof runoff, landscape drains, and irrigation water will go. Directing a downspout behind a wall without a planned outlet is a common and avoidable mistake.
For higher walls, walls supporting a driveway or structure, or walls built near property lines, engineering may be required. Local permitting requirements can also apply depending on the wall height and site conditions. These are not details to leave until construction is underway. They should be resolved during design, when the team can coordinate grading, drainage, hardscape, planting, and approvals as one plan.
Build Access, Safety, and Outdoor Living Into the Layout
A retaining wall can make a yard more useful, but only if people can comfortably move through the new levels. Stairs, pathways, landings, and handrails should be considered at the same time as the wall itself. Adding them later can disrupt drainage, create awkward proportions, or compromise the overall look.
For a family entertaining outdoors, a broad set of steps may connect an upper patio to a lower lawn or pool area. For a side yard with limited access, a simple path with low retaining edges may be all that is needed. Lighting placed along stairs, caps, and walkways improves safety while giving the landscape an inviting evening presence.
Planting also has a practical role. Deep-rooted, site-appropriate plant material can help stabilize adjacent slopes, while layered planting softens the face of the wall. Avoid placing large trees too close to a wall without considering mature root growth and maintenance needs. Roots, irrigation, and falling debris can all affect long-term performance.
Plan for Maintenance From the Beginning
Retaining walls are durable, but they are not maintenance-free. Periodic inspections after heavy rain can reveal early signs of trouble, including displaced caps, cracks, soil movement, blocked drain outlets, or erosion near the ends of the wall. Correcting a small drainage issue early is far easier than rebuilding a compromised section later.
Landscape maintenance should support the wall rather than work against it. Irrigation heads should not spray continuously against the face or saturate soil behind the structure. Mulch should be kept from blocking drainage outlets. Pruning and plant replacement should preserve access to key areas when possible.
When design, construction, and landscape care are coordinated by one experienced team, the wall is more likely to remain integrated with the property over time. Berryman Design Group approaches these projects as part of the complete outdoor environment, coordinating the details that affect both immediate appearance and lasting performance.
A retaining wall should make the slope feel like an opportunity, not a compromise. With the right grading, drainage, materials, and landscape plan, it can create the level places where everyday outdoor living naturally happens.
-
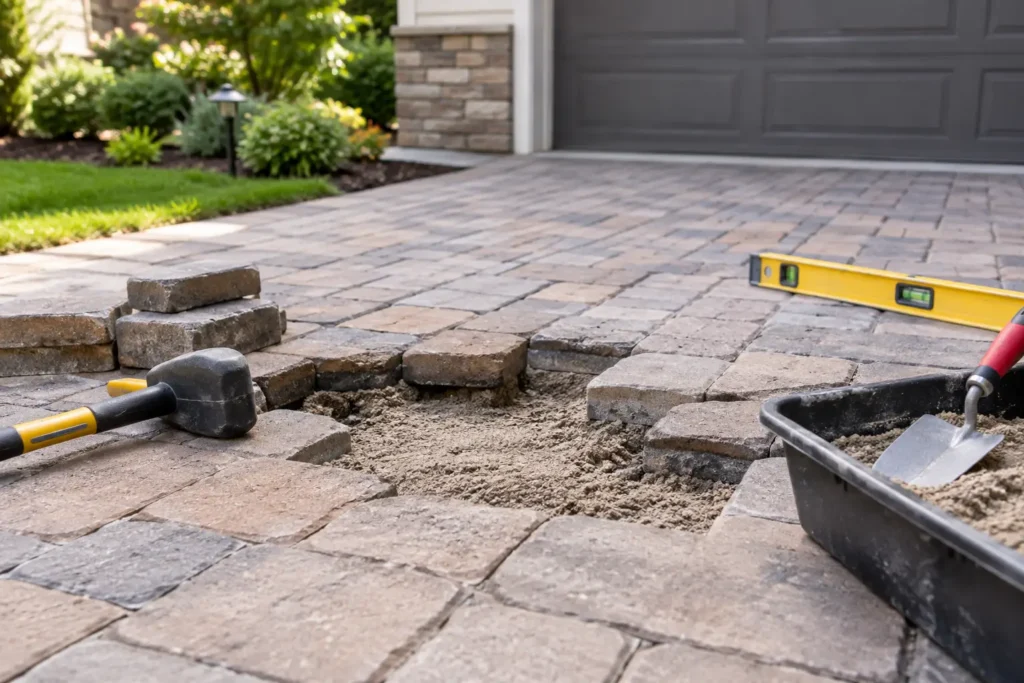
How to Repair a Paver Driveway After Settling
A paver driveway rarely settles for no reason. One low area can collect water after an afternoon Sarasota storm, loosen joint sand, and make a polished front approach feel neglected. To repair a paver driveway after settling properly, the visible dip must be treated as a symptom. The lasting work happens below the pavers, where the base, soil, edging, and drainage either support the surface or allow it to move.
For a small, isolated depression, a targeted repair may be all that is needed. For settling that runs along the garage apron, driveway edge, or multiple wheel paths, a broader evaluation is the wiser investment. The goal is not simply to make the driveway look level again. It is to restore a stable, well-drained surface that complements the home and holds up through Florida’s heat and rain.
Why Paver Driveways Settle
Unlike poured concrete, an interlocking paver driveway is designed as a flexible system. Individual units can be removed and reset, which is one of the material’s best advantages. But that system depends on proper preparation: compacted subgrade, a correctly graded aggregate base, bedding sand, secure edge restraints, and joints filled with sand.
Settling often begins when one of those layers is compromised. In Sarasota and throughout South Florida, heavy rainfall can wash fine material from beneath the driveway or saturate weak subsoil. Water escaping from a damaged irrigation line, roof downspout, or improperly directed drainage outlet can create a localized void. Poor compaction during original installation can also show up years later, especially where vehicles routinely turn, brake, or park.
Tree roots, shifting soil near utility trenches, and failing driveway borders are other common causes. A driveway that slopes toward the house or garage can create more than an appearance issue. Standing water near the foundation, entry, or garage threshold deserves prompt attention.
Assess the Problem Before Lifting Pavers
The pattern of the settlement provides useful clues. A single sunken paver or a small shallow area may point to minor bedding-sand movement. A larger dip involving several rows usually indicates base settlement. Pavers that spread apart, rotate, or creep outward near an edge may signal failed restraints rather than a problem directly underneath the field of pavers.
Walk the driveway after a rainstorm and note where water collects, where it flows, and how long it remains. Look for washed-out joint sand, cracks or separation in the concrete edge restraint, soft landscape beds beside the driveway, and downspouts that discharge too close to the paving. If irrigation is nearby, check for unusually green areas, persistent dampness, or a sudden increase in water use.
It also helps to consider timing. Settlement that appeared soon after a new driveway installation may relate to base preparation or drainage details. A driveway that performed well for many years before developing a dip may have a new cause, such as an irrigation leak, root activity, or erosion at a border.
A professional assessment is especially worthwhile when settlement is widespread, when the driveway meets a garage or retaining wall, or when the cause is not clear. Resetting pavers without correcting a water or base issue can produce a smooth driveway for a season and the same depression later.
How to Repair a Paver Driveway After Settling
A successful repair starts by carefully removing the affected pavers and preserving the pattern. A crew typically begins at an accessible edge or uses specialized tools to lift units without chipping them. Each paver is set aside in order, particularly with multicolor blends, borders, or custom inlays where placement affects the finished appearance.
Remove the Loose Bedding Material
Once the pavers are out, the condition of the bedding layer and base becomes visible. Loose, muddy, contaminated, or washed-out sand should be removed rather than leveled over. If the aggregate base beneath it is soft or visibly uneven, the repair area needs to extend beyond the immediate low spot until stable material is reached.
This is where shortcuts create problems. Adding a thick layer of bedding sand to raise pavers may make the surface look right temporarily, but bedding sand is not intended to compensate for a failed base. Excess sand can shift under vehicle loads and allow the pavers to settle again.
Correct the Cause and Rebuild the Base
If water is the source of the problem, drainage work comes first. That may mean repairing an irrigation leak, redirecting a downspout, adjusting landscape grading, adding drainage collection, or rebuilding an eroded edge. The appropriate solution depends on where the water originates and where it can safely discharge.
The exposed subgrade should be shaped and compacted to create a firm foundation. Then, clean aggregate base material is installed in controlled lifts and mechanically compacted. The final base must match the surrounding elevation while maintaining the intended driveway slope. This is particularly important near garages and entrances, where a small grading error can direct water toward the home.
The depth of reconstruction depends on the extent of the failure and the expected loads. A decorative walkway and a driveway used by SUVs, delivery vehicles, or frequent guests do not require the same structural approach. Paver thickness, soil conditions, and drainage design all influence the right repair detail.
Reset Pavers and Restore the Joints
After the base is stable, a thin, even layer of clean bedding sand is screeded across the repair area. The pavers are reset in the original pattern, checked against adjacent surfaces, and cut as needed for a precise fit at edges. The finished surface should be level across the repair while still following the designed slope for drainage.
Joint sand is then swept into the spaces between pavers, and the area is compacted with appropriate equipment to seat the units and consolidate the joints. Polymer-modified joint sand can be useful in many driveway applications because it helps resist erosion and weed growth. It must be selected and installed correctly, however, since drainage characteristics, paver type, and joint width matter.
Finally, edge restraints should be inspected and repaired where needed. These restraints keep the paved field interlocked under traffic. A driveway can have an excellent base and still begin to spread if its borders are not secure.
When a Spot Repair Is Not Enough
Targeted repairs are practical when the damage is localized and the underlying cause has been corrected. They are often the most efficient way to address a settled area around a downspout, a repaired irrigation line, or a small section affected by root removal.
A full or partial driveway rebuild may be the better choice when dips appear in several locations, pavers are extensively uneven, or the original driveway has broad drainage deficiencies. It may also make sense when homeowners are planning a larger front-yard renovation, new landscape lighting, updated entry walkways, or a change in driveway layout. Addressing grading, hardscape, and planting together can create a more cohesive result than repairing each issue separately over time.
There is a cost trade-off. A spot repair has less immediate disruption and expense, but it cannot solve hidden weaknesses beyond the repaired zone. A larger reconstruction requires more investment, yet it gives the project team an opportunity to rebuild the supporting system, improve water management, and refresh aging pavers or borders at the same time.
Protect the Repair From Future Settlement
After the driveway is repaired, water management remains the most effective form of prevention. Keep downspouts and landscape drainage outlets from emptying directly onto or beneath the paver field. Maintain irrigation so overspray and leaks do not saturate driveway edges. If adjacent planting beds are raised, confirm that soil and mulch are not washing onto the pavers or trapping water along the border.
Regular inspection is simple but valuable. Replenish joint sand when it becomes low, address loosening edge restraints early, and watch for changes after major storms. Pressure washing can improve appearance, but aggressive cleaning can remove joint sand if it is done carelessly. The driveway should be cleaned with its structure in mind, then re-sanded as needed.
For homeowners planning a more comprehensive property update, Berryman Design Group can coordinate driveway repair with drainage, landscape architecture, irrigation, and surrounding outdoor improvements. That unified approach helps ensure the driveway is not treated as an isolated surface when the real issue may involve the larger property.
A level paver driveway should feel effortless: water moves where it should, vehicles park on a stable surface, and the entry complements the home from the curb to the front door. Repairing the base and drainage correctly gives that result a far better chance of lasting.
-
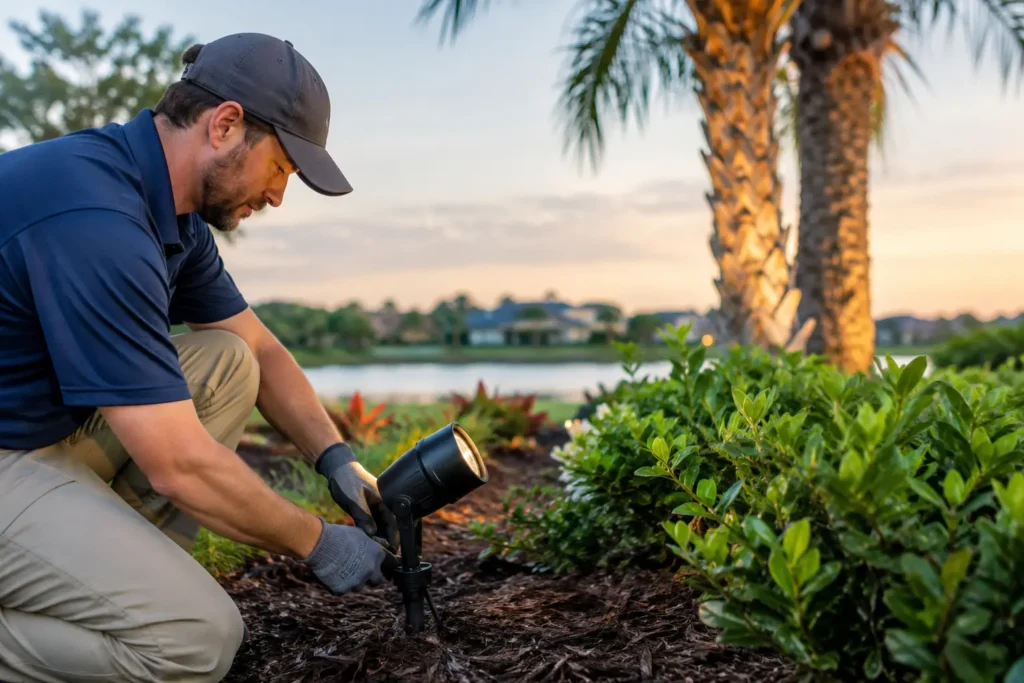
How to Maintain Landscape Lighting in Florida
A landscape lighting system can look perfectly composed on installation day, then slowly lose its effect under Florida sun, summer rain, salt air, and fast-growing plant material. Learning how to maintain landscape lighting protects more than evening curb appeal. It keeps pathways usable, draws attention to the right architectural details, and helps your property feel as considered after dark as it does during the day.
For Sarasota homeowners, maintenance is not a once-a-year chore. It is a practical routine of keeping fixtures clean, plants in scale, connections dry, and the nighttime design aligned with the way you use the property.
Start With a Nighttime Walk-Through
The most useful inspection happens after sunset. Turn on the entire system and walk the property slowly, beginning at the street and moving toward entry paths, outdoor living areas, pool decks, and garden spaces. Look for dark patches, overly bright hotspots, fixtures that shine into windows, and lights that are no longer aimed at the feature they were meant to highlight.
Landscape lighting is often affected by gradual changes that are easy to miss. A palm may grow into the beam of an uplight. A shrub can conceal a path light. Mulch may settle around a fixture, changing its angle or blocking its lens. What worked beautifully during the original installation may need thoughtful adjustment as the landscape matures.
Pay close attention to safety lighting near steps, grade changes, driveways, and walkways. These areas should be comfortably visible, not washed out with glare. If a fixture produces harsh light or casts distracting shadows, repositioning it or changing the lamp may produce a better result than simply adding more fixtures.
How to Maintain Landscape Lighting Fixtures
Florida weather leaves a mark on outdoor materials. Pollen, irrigation overspray, mulch, soil, and mineral deposits can collect on lenses and fixture bodies. Every few months, switch off the system and allow fixtures to cool before cleaning them with a soft cloth, mild soap, and water. Avoid abrasive pads and harsh chemical cleaners, which can scratch lenses or damage protective finishes.
Clear leaves, mulch, and debris from around each fixture. This is especially important for well lights and in-grade fixtures, where standing water and trapped organic matter can obscure the beam or create drainage problems. Make sure lenses are seated properly and that fixture covers have not cracked.
Brass and copper fixtures naturally develop a patina. Many homeowners appreciate that weathered appearance, particularly in established gardens and coastal-inspired settings. If you prefer a brighter metal finish, use a cleaner designed specifically for the fixture material. The decision is largely aesthetic, but any cleaning method should preserve the integrity of the fixture rather than strip it aggressively.
Check stakes and mounting hardware as well. A fixture that leans after a heavy rain may not be damaged, but its beam can be noticeably off target. Reset it carefully, taking care not to pull on the wire beneath the soil.
Keep Plant Growth From Changing the Design
A well-designed lighting plan and a healthy landscape must be maintained together. In Sarasota, warm temperatures and seasonal rain can create rapid growth around trees, hedges, groundcovers, and flowering beds. Regular pruning keeps light where it belongs and prevents foliage from resting against warm fixtures.
This does not mean cutting plants back indiscriminately. The goal is to maintain the original visual relationship between the plant, hardscape, home, and light. A canopy may be intentionally lit from below to show its structure, while a hedge might be softly grazed to create depth along a property line. Prune selectively so the lighting continues to support the landscape architecture rather than compete with it.
Plants should also have room around fixtures for air circulation and service access. Dense groundcover can hide equipment until a bulb fails or a connection needs attention. Keeping a small, clean zone around each fixture makes routine inspections simpler and helps prevent moisture from lingering where it should not.
Check Lamps, Transformers, and Timers
LED landscape lighting has a long service life, but it is not maintenance-free. When a fixture is dimmer than surrounding lights, flickers, or fails to turn on, inspect the lamp and connections before assuming the entire fixture needs replacement. Use lamps with the correct voltage, wattage, beam spread, and color temperature for the system.
Color consistency matters more than many homeowners expect. Replacing one warm 2700K lamp with a cooler white lamp can make that fixture stand out for the wrong reason. For a cohesive residential setting, keep replacement lamps consistent with the existing design. If several lamps are nearing the end of their useful life, replacing a group at once can prevent a patchwork appearance.
The transformer should be checked periodically for secure connections, signs of corrosion, and proper operation. It should remain protected from sprinklers, pooling water, and landscape debris. If your system includes a photocell, timer, or smart controller, confirm that the schedule still matches the season and your household routine. Sarasota’s changing sunset times may warrant minor timer adjustments throughout the year.
A system that turns on before dusk wastes energy and can look out of place. One that turns off too early may leave guests navigating a dark driveway or patio. Smart controls can make scheduling easier, but they still benefit from an occasional review.
Protect Wiring and Connections From Water
Low-voltage systems are designed for outdoor use, yet Florida’s heavy rain makes proper drainage and sealed connections essential. During inspections, look for exposed wire, damaged insulation, loose connectors, or fixtures sitting in persistently wet soil. A light that works intermittently after rain often points to a connection or moisture issue that deserves prompt attention.
Irrigation heads are another common concern. Sprinklers should not spray directly onto lighting fixtures, lenses, transformers, or connection points. Repeated overspray can leave mineral buildup, encourage corrosion, and shorten the life of components. Coordinate irrigation adjustments with lighting maintenance, especially after a landscape renovation or plant replacement changes the watering pattern.
Do not bury wire connections in a way that makes them impossible to access. Professional-grade, weather-rated connectors are designed to protect the connection while allowing future service. If you find a damaged cable or suspect a voltage drop across a long run, involve a qualified landscape lighting professional. Electrical troubleshooting is not the place to rely on a temporary fix.
Adjust for Storm Season and Coastal Conditions
Before hurricane season, inspect fixtures near trees, large planters, gates, and freestanding landscape elements. Secure or reset any loose stakes, and remove branches that could fall onto fixtures or cables. After a major storm, wait until standing water has receded before checking the system, then inspect for shifted fixtures, damaged branches, exposed wiring, and tripped controls.
Homes closer to Sarasota Bay or the Gulf may need more frequent attention because salt air accelerates corrosion. Material selection becomes especially valuable in these settings. Solid brass, copper, and high-quality composite fixtures usually hold up better than inexpensive painted metal products, though every material benefits from regular rinsing and inspection.
Know When a Professional Review Is Worth It
Some landscape lighting tasks are straightforward: cleaning lenses, trimming plants, resetting fixture angles, and reviewing timer settings. Others call for a trained eye. Repeated lamp failures, uneven brightness across a run, frequent breaker or transformer issues, water intrusion, and aging fixtures are all reasons to schedule a professional evaluation.
A lighting review can also be valuable after a new pool, patio, driveway, outdoor kitchen, or landscape renovation. Adding one feature often changes how the entire property is used at night. Rather than placing a few extra lights where darkness feels most obvious, a coordinated plan can preserve visual balance, improve safety, and avoid an overlit result.
At Berryman Design Group, landscape lighting can be maintained as part of a broader approach to the property, alongside planting, irrigation, hardscape, and outdoor living improvements. That coordination matters because the strongest nighttime environments are not created by lighting alone.
A few minutes spent walking the property after dark can reveal what daytime maintenance cannot. Keep the system clean, clear, dry, and properly aimed, then let the light do its quiet work: welcoming guests, extending the use of your outdoor spaces, and giving your home a refined presence long after sunset.
-
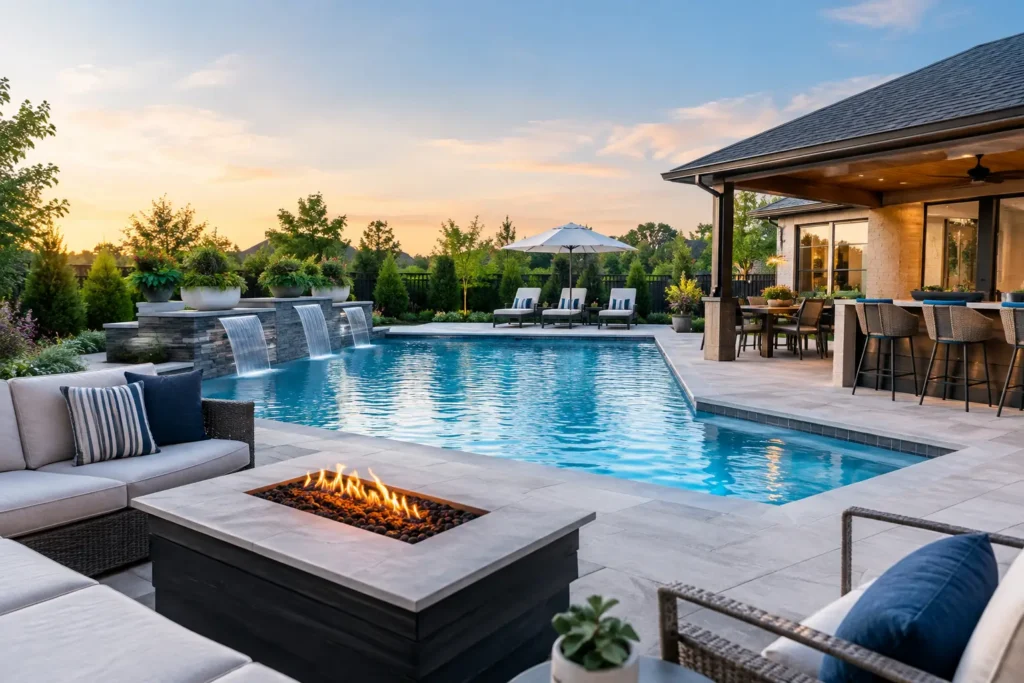
Custom Pool Design for Backyard Entertaining
A pool should not feel like an object placed behind the house. It should make the entire property work better – from the view through the living room windows to the way guests move from the kitchen to the terrace at sunset. A successful custom pool design for backyard living begins with that larger picture: how your home, landscape, entertaining areas, and daily routines are meant to connect.
For Sarasota homeowners, the design also has to perform in real conditions. Strong sun, heavy summer rain, salt air near the coast, mature vegetation, changing grades, and year-round use all influence the right choices. The most rewarding pool projects are not defined by a single dramatic feature. They are carefully planned outdoor environments that look intentional, function comfortably, and remain manageable over time.
Start With How You Will Use the Space
Before selecting a pool shape or tile, define the role the space needs to play. A family that wants room for children to splash, swim laps, and gather on weekends has different priorities than homeowners seeking a quiet water feature beside a primary-suite terrace. A property intended for frequent entertaining may need generous circulation, a visible outdoor kitchen, and multiple seating zones rather than the largest possible pool.
The house should guide the plan. Sightlines from interior gathering rooms can establish the pool’s focal point, while doors and pathways determine where people naturally enter the yard. On a compact lot, a long, narrow pool may preserve room for dining and planting. On a larger property, a pool can become one destination within a broader landscape that includes lawn, shade trees, a fire feature, or a separate guest area.
It also helps to decide what should happen around the water. Lounging, dining, grilling, conversation, and children’s play all require usable ground plane, not leftover deck space. A pool that occupies too much of the yard can make an otherwise beautiful property feel constrained. Conversely, an undersized pool can appear disconnected when surrounded by oversized hardscape. Proportion is where custom planning earns its value.
Custom Pool Design for Backyard Conditions in Sarasota
A Sarasota poolscape must be designed for heat, rain, and long growing seasons. Shade is one of the most valuable comforts you can build into the project. This may come from a covered lanai, a thoughtfully positioned pergola, existing canopy trees, or new plantings that will mature over time. The right approach depends on the architecture, sun exposure, and desired maintenance level.
Deck materials require the same practical attention. Light-colored surfaces can reduce heat underfoot, but the material must also provide appropriate traction when wet and suit the home’s architecture. Natural stone, porcelain pavers, shell stone, and concrete finishes can all be appropriate choices. Their appearance, cost, heat retention, installation requirements, and maintenance needs differ, so material selection should be made alongside the overall landscape plan rather than as a late-stage finish decision.
Drainage is equally important. Florida downpours can overwhelm an outdoor area that has not been properly graded. Deck slopes, drainage collection, planting bed elevations, and the transition from pool deck to lawn should direct water away from the home and prevent standing water. This is not the most glamorous part of a design, but it protects the investment and helps the outdoor space remain usable after a storm.
Choose Features That Match the Property
Water features, sun shelves, spas, raised walls, and fire elements can give a pool distinct character, but each should have a purpose. A sun shelf is particularly useful for young children, relaxed lounging, or setting chairs partly in the water. A spa can extend the season and create a quieter evening retreat. A raised water wall may provide privacy or soften noise from a nearby street.
More features do not automatically create a better result. Each feature adds cost, equipment considerations, and maintenance responsibilities. On some properties, a clean pool line framed by exceptional planting and lighting has more impact than several competing focal points. The best designs know where to be expressive and where to be restrained.
Create One Outdoor Living Environment
The strongest pool projects feel connected to the residence instead of divided into separate zones. This often means aligning paving patterns, colors, and architectural details with the house. It can mean extending a roofline or using a garden wall to define the edge of the outdoor room. Even a modest design benefits when the scale of the pool, deck, furniture, and planting beds is considered together.
Outdoor kitchens deserve particularly careful placement. They need convenient access to the home while keeping the cook part of the conversation. Positioning also affects smoke, prevailing breezes, service access, and views. A dining table should have enough clearance for chairs and foot traffic, while lounge areas benefit from a degree of separation from active cooking and pool entry points.
Privacy should be planned early, not treated as an afterthought. Hedges, palms, layered shrubs, screen walls, and strategically placed structures can filter views without making the yard feel closed in. Planting is often more effective when it has depth: a combination of canopy, mid-level structure, and lower texture creates a finished appearance while allowing air and light to move through the landscape.
Lighting turns a daytime pool area into a usable evening setting. Pool lighting provides safety and visual depth, but landscape lighting creates the atmosphere. Soft illumination at pathways, planting beds, specimen trees, and architectural walls makes the property feel more welcoming after dark. Avoid overly bright fixtures and aim light where it is useful. The goal is to reveal the space, not flatten it.
Plan for Maintenance Before Construction Begins
A custom design should account for how the property will be cared for once construction is complete. Pool equipment needs accessible, discreet placement with adequate ventilation and service clearance. Plant selections should fit the site and avoid creating unnecessary debris in the water. Large trees near a pool can offer valuable shade, yet some species shed heavily or have root systems that require thoughtful setbacks.
Irrigation zones must support new planting areas without overspraying decks or water features. Landscape lighting, drainage, and equipment lines should be coordinated before hardscape is installed. This integrated planning minimizes disruptive changes later and helps every component perform as intended.
Maintenance preferences should also shape the design. Some homeowners enjoy a lush, layered garden and are comfortable with regular horticultural care. Others prefer a more edited planting palette, durable materials, and a streamlined maintenance routine. Neither approach is inherently better. The right answer is the one that matches the way you want to own the property five years from now, not simply the way you want it to photograph on completion day.
Work With One Coordinated Team
Pool projects often involve multiple disciplines: landscape architecture, construction, hardscape installation, irrigation, lighting, planting, and ongoing maintenance. When those decisions are made independently, details can fall between scopes. A drainage solution may conflict with a deck elevation, or a planting plan may not account for equipment access.
A unified design and construction process creates clearer accountability from the first concept through long-term care. At Berryman Design Group, that means considering the pool as part of the full residential property – its architecture, landscape, construction requirements, and future maintenance – rather than treating it as a stand-alone addition.
Your backyard has the potential to become the part of the home you use most often. Give it a plan that respects the site, supports the way you live, and leaves room for the moments that make a home feel genuinely yours.
Month